Once you have unlocked the device’s bootloader, you have literally opened the floodgates to a plethora of customizations. These include the ability to install a customized firmware (custom ROM), replace stock recovery with a custom one like TWRP, LineageOS recovery, etc. Likewise, you could even get access to the system partition by rooting your device via Magisk: with TWRP or without TWRP (by patching stock boot.img). While some tech enthusiasts are contained with these modifications, others take it a step further and install a customized kernel. And this guide focuses on just that. Today, we will show you the steps to install the ElementalX 1.00 Custom Kernel onto your OnePlus Nord device. But before we list out the instructions steps, let’s check out the feature set of this kernel and what all you could do via it. Follow along.
How to Fix Unauthorized Device with ADB Commands [3 methods]Fix Magisk Module Bootloop without TWRP RecoveryFix: pip is not recognized as an internal or external commandHow to Fix Error: Cannot load recovery.img
What is ElementalX 1.00 Custom Kernel
ElementalX is among the reputed names when it comes to the custom kernel domain. Incorporating tons of useful features, giving out superior performance, and at the same time providing a longer battery life, well, there’s not much one could have asked for. Furthermore, you could also overclock or underclock the device’s CPU. Likewise, it also enables the ever-popular Wake gestures such as the Double Tap 2 Wake. On that note, here’s the complete feature list of the ElementalX 1.00 Custom Kernel for OnePlus Nord:
Features of ElementalX 1.00 Kernel for OnePlus Nord
-Optimized for performance and battery life -Advanced color control (RGB, hue, saturation, contrast, value, K-Lapse) -Adjust vibration -Wake gestures (S2W & DT2W) -Sweep2sleep -Block wake-locks -CFQ, noop, BFQ, deadline, FIOPS, SIO, maple, and zen i/o schedulers -Adrenoboost option -Option to disable fsync -backlight min -Option to disable touchboost -WireGuard support Now, before we list out the instructions steps, there are a few prerequisites and some important points that need your attention. Make sure to go through them and checkmark all these requirements.
Prerequisites
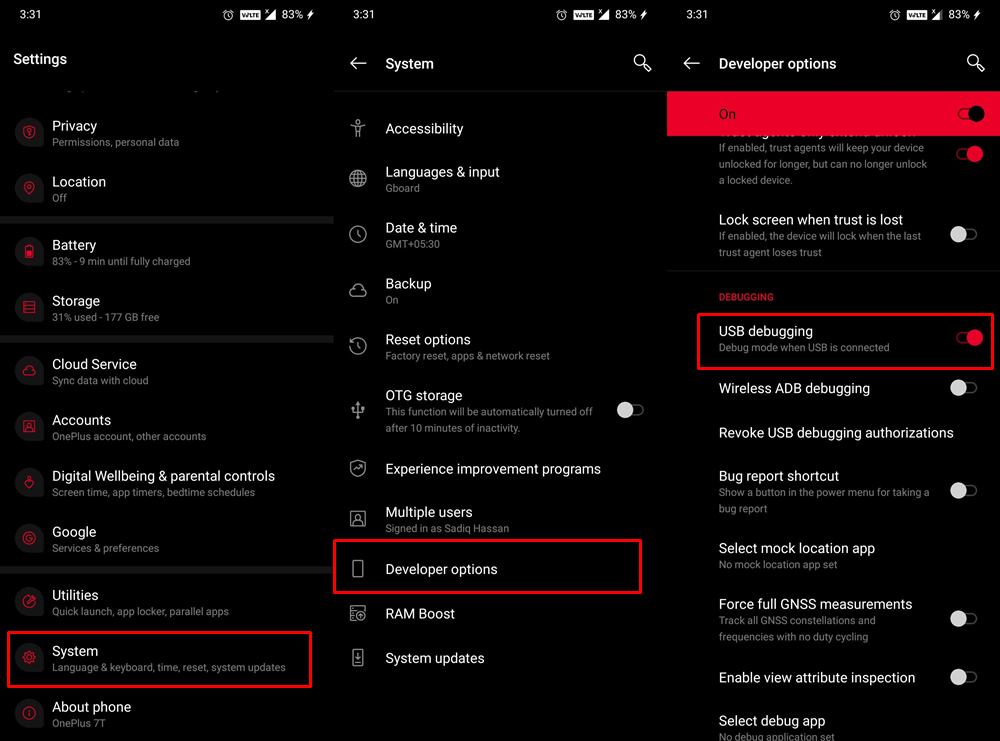
To begin with, it is recommended that you take a complete device backup to be on a safer side.Next up, also enable USB Debugging on your device. We would only be needing this to boot your device to TWRP Recovery. If you know the hardware key combinations, then you could skip enabling it. With that said, to enable this feature, go to Settings > About Phone > Tap on Build Number 7 times > Go back to Settings > System > Advanced > Developer Options > Enable USB Debugging. [Don’t Miss: Enable USB Debugging on a Broken Android Device’s Screen? Here’s a Workaround]. Likewise, install the Android SDK Platform Tools. This will provide us with the necessary ADB and Fastboot binaries.
Downloads
ElementalX 1.00 Custom Kernel for OnePlus Nord: Download Link. Credits: XDA Recognized Developer flar2.
How to Fix Unauthorized Device with ADB Commands [3 methods]Fix Magisk Module Bootloop without TWRP RecoveryFix Mi Account Authorization | Unbrick Xiaomi | EDL ModeHow to Fix Error: Cannot load recovery.img
Things to keep in mind
Some of the kernel’s functions might not work if you are running a custom ROM. A user running Pixel Experience on his OnePlus Nord wasn’t able to use the doubletap2wake feature. To this, the developer replied that “This kernel is made for stock…”. So it is better to stick with the OxygenOS while using this kernel. With that said, let’s now proceed with the steps to install ElementalX 1.00 Custom Kernel on OnePlus Nord.
How to Flash ElementalX 1.00 Custom Kernel on OnePlus Nord
There are two different methods to flash the kernel. You could either do so directly via TWRP or via the EX Kernel Manager app. Since the app is paid and requires root, hence we wouldn’t be taking that method here. We would stick with the TWRP method. However, even then we would recommend you to root your device. The reason for the same will become clear in the coming steps [STEP 3 to be precise]. So without further ado, let’s get on with the steps to install ElementalX 1.00 Custom Kernel on OnePlus Nord.
STEP 1: Unlock Bootloader on OnePlus Nord
To begin with, you will have to unlock the bootloader on your OnePlus Nord. So head over to our detailed guide on How to Unlock the Bootloader on OnePlus Nord.
STEP 2: Install TWRP Custom Recovery
For flashing custom kernel, you need a custom recovery like TWRP. So if you haven’t installed it yet, then refer to our guide on How to Install TWRP Recovery on OnePlus Nord.
STEP 3: Root OnePlus Nord [Optional but Recommended]
While you may flash this kernel without rooting the device, it is highly recommended that you root your OnePlus Nord. This is because you wouldn’t be able to enjoy most of the kernel’s features on a non-rooted device. With that said, refer to any of the two below-mentioned guides:
How to Root OnePlus Nord using TWRP RecoveryHow to Root OnePlus Nord without TWRP (using Patched Boot file)
But what about OTAs after rooting your Nord? Well, you could easily Install OxygenOS OTA on Rooted OnePlus devices. On that note, once you have rooted your device, proceed with the below steps to install ElementalX 1.00 Custom Kernel on OnePlus Nord.
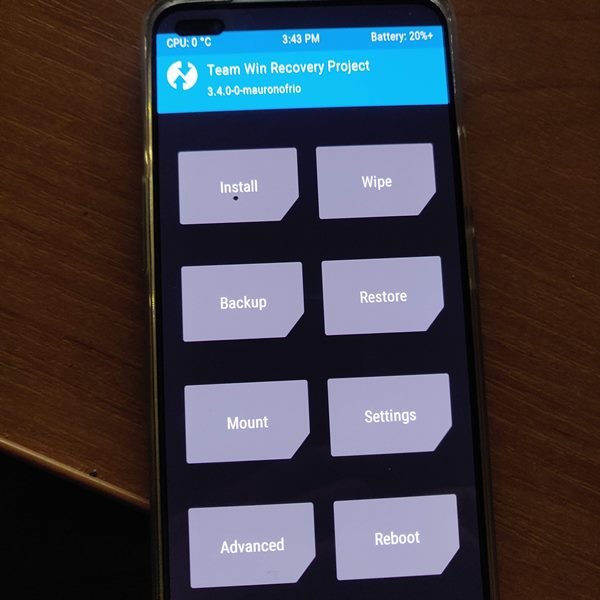
STEP 5: Boot OnePlus Nord to TWRP Recovery
You will now have to boot your device to TWRP. For that, you could refer to our guide on how to boot your device to TWRP Recovery. Or refer to the below instructions:
STEP 4: Backup Boot Partition
The boot partition is where the kernel is stored. So it is always advisable to create a backup of this partition before making any changes. In this case, there could be two reasons for the backup. First off, if you end up tweaking some settings that result in a bootloop or soft-brick, then you could easily recover the stock boot.img from TWRP and bring back your device to normal working condition. Secondly, it will also help you to install OTA on a rooted device. With that said, here are the steps to create a backup of the boot partition.
STEP 5: Install ElementalX 1.00 Kernel on OnePlus Nord
With this, we conclude the guide on how to install ElementalX 1.00 Custom Kernel on OnePlus Nord. Do keep in mind that you would still need a kernel manager app to make full use of this kernel. In this regard, the developer has suggested for EX Kernel Manager. So we guess, now is the perfect time to put your Free Google Money to use. Or you could try out a plethora of other kernel manager apps from the Play Store. On that note, if you have any queries concerning the aforementioned steps, do let us know in the comments section. We will get back to you with a solution as soon as possible.
[GUIDE] Flash ROMs/Magisk/TWRP/Kernels on A/B Partition DevicesEverything About Magisk- Manager, Modules, and MoreBest Magisk Modules of 2020 [PART-1]How to Flash Various Files in A/B Partition Devices
About Chief Editor