Finally, these IMG files will be flashed via Fastboot Commands to their respective partitions. Once that is done, you will get back the device in full working condition. Furthermore, you could also use this guide if you wish to fix bootloop or soft-brick issues. So without further ado, let’s start this guide . While OnePlus began its journey by offering feature-rich devices at an affordable price, yet it slightly seemed to be deviating from its USP in recent times. However, with its Nord series, it has out all these doubts to rest. Having the absolute best in all the departments (except for the below-par macro and depth sensor), the device wouldn’t burn a hole in your pockets. Plus it’s already among the most active devices in custom development. And as opposed to other OnePlus devices, it might soon be filled with a plethora of users in the custom ROM segment. One major reason for the same is the questionable tactics of providing just one single update to the Nord series. The fact that the device is begin launched with Android 10, and would hence only receive Android 11 that many other devices come with pre-built only add salts to the wounds. Anyways, the doors to custom binaries are always open. Apart from flashing custom ROMs, you could replace the device’s stock recovery with a custom one such as TWRP. This in turn will allow you to flash IMG and ZIP files, create Nandroid backups, erase device partitions, etc. Likewise, you could also gain administrative rights to your device by rooting it via Magisk [using TWRP or without TWRP via patching and flashing boot.img] However, these tweaks might be a cause of concern sometimes as well. If you didn’t execute any step correctly or flash an older or incompatible build of any binary, then your device might end up in a bootloop or soft-bricked state. If that ever happens with you, then this guide is here to help you out. Today, we will show you how to restore your OnePlus Nord to Stock OxygenOS via Fastboot Commands. Follow along for the detailed instructions.
Install Custom Kernel ElementalX 1.00 on OnePlus NordHow to Install AOSP Android 11 on OnePlus NordRoot OnePlus Nord without TWRP (using Patched Boot file)How to Install TWRP Recovery on OnePlus NordHow to Root OnePlus Nord using TWRP RecoveryUnlock the Bootloader on OnePlus Nord
Restore OnePlus Nord to Stock via Fastboot Commands
Before we list out the instructions, there are a few requirements that you need to qualify. Make sure to go through them and only then proceed with the unbrick steps.
Prerequisites
Create a complete device backup, if possible. This is because we will have to wipe off all the data from your device via the fastboot-w command later on. So a backup beforehand is of utmost importance. Since most of you might be stuck in fastboot, it might be a tough job to do. But if your device is up and running, then please create a backup beforehand.Next up, install the Android SDK Platform Tools on your PC. This will provide you with the necessary ADB and Fastboot binary files.
These were the required files. You may now proceed ahead with the steps to restore your OnePlus Nord device to OxygenOS by flashing the Stock ROM via Fastboot Commands.
STEP 1: Boot OnePlus Nord to Fastboot Methods [3 Methods]
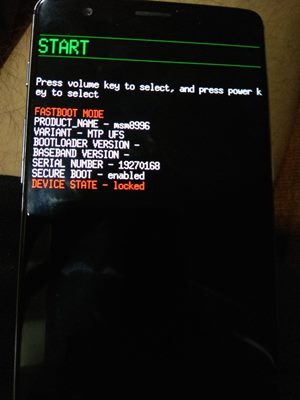
First and foremost, you will have to boot your OnePlus 8 series device to Fastboot Mode. This could be done via 3 different methods, depending on the scenario you are facing as of now:
If your device is soft-bricked, well then it might already be booted to Fastboot.If it is in a continuous boot-loop, then wait for the battery to dry out so that it powers off. Then plug in the charger and at the same time press and hold the Volume Up, Volume Down, and Power buttons together. The timing is extremely important in this, if done at the right time, then you should have no issues in booting to Fastboot or Bootloader Mode.On the other hand, if your device is perfectly working then use the Advanced Reboot menu under Developer Options and access the Fastboot Mode option. Or you could also enable USB Debugging from Developer options and then use the adb reboot bootloader command. Anyways, once your device is booted to Fastboot Mode, head over to the next set of instructions. to restore your OnePlus Nord to stock OxygenOS by flashing the Stock ROM via Fastboot Commands.
STEP 2: Download OnePlus Nord Stock OxygenOS ROM
Now head over to the OnePlus Support Forum and download the latest OxygenOS for your OnePlus Nord series device. The firmware would be in ZIP format. If you see the firmware in JAR format, then simply use the 7 ZIP, WinZIP, WinRAR extraction tool to extract its content.
How to Install OxygenOS OTA on Rooted OnePlus devicesDownload OnePlus Nord Stock Boot Image Files [All Versions]How to Extract Stock Boot.img from OnePlus OxygenOS Stock ROMFix Sahara communication failed error in MSM Download Tool
STEP 3: Extract OnePlus Nord Payload.Bin File
After extraction, you would notice that there aren’t any partition files. Rather you would see a payload.bin file. It is this file that is holding all the partition IMG files. So you will need to extract this patload.bin file to get hold of all the other files. In this regard, this guide should help you out: How to Extract Stock Boot. img from OnePlus OxygenOS Stock ROM.
Follow the steps given in this linked guide and you should all the files inside the Python output folder (again refer to the linked guide). For example, the above image shows all the files that I got after extracting the OnePlus Nord payload.bin file. Let’s now proceed to the next step to restore your OnePlus Nord to stock OxygenOS by flashing the Stock ROM via Fastboot Commands.
STEP 4: Flash OnePlus OnePlus Nord Stock OxygenOS- The Initial Setup
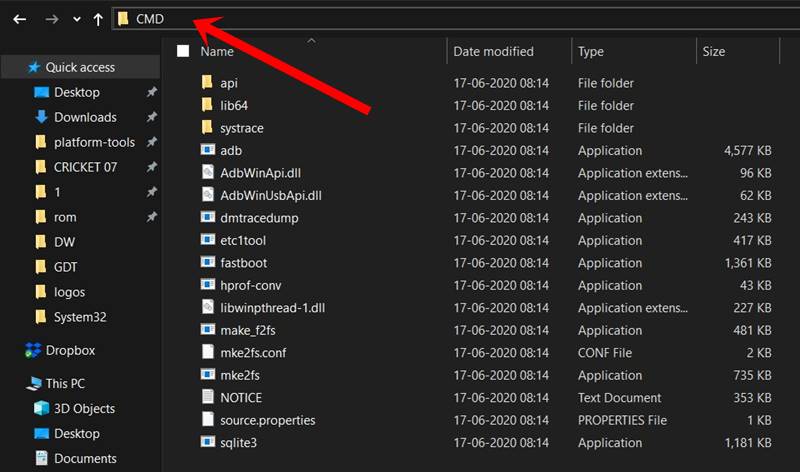
Once you have got all the OxygenOS ROM extracted files, transfer them to the platform-tools folder. Inside the same folder, type in CMD in its address bar and hit Enter (see below image). This will launch the Command Prompt window. Now connect your device to the PC via USB cable. Make sure that is booted to Fastboot. Finally, you may now flash all the OnePlus Fastboot ROM files via Fastboot Commands.
Given below in STEP 5 we have listed all the commands for the same. Copy-paste the first command in the CMD window, hit Enter, then do so for the next one, and so on. Furthermore, some commands like when the system.img file is being flashed, will take up quite a lot of time. This is completely normal. Along the same lines, you might also get an “Invalid sparse file format at header magic” message. Well then it is not an error, just wait for a few seconds and it will automatically be gone.
How to Fix TWRP Error 70 [With Screenshots]How to Fix TWRP Error 20 GApps after flashing LineageOSFix TWRP Error 7 (While Flashing Custom ROM via TWRP)How to Boot into Recovery (TWRP/Stock) from Fastboot Mode
STEP 5: Restore OnePlus Nord to Stock ROM via Fastboot Commands
So here are the required Fastboot commands to restore your OnePlus Nord to stock OxygenOS by flashing the Stock ROM. The first command (fastboot -w) will completely wipe off all the data from your device, so make sure to have a backup beforehand. Then the last command at the end (fastboot reboot bootloader) will reboot your device back to Fastboot Mode. After this, you may easily reboot to the OS from Fastboot either by bringing up the Reboot option via Volume Keys and then pressing the Power button to confirm the decision. You could also execute the fastboot reboot command (only do so after all the files have been flashed and your device has been rebooted to Fastboot). And this time, you no longer have to flash these files to both these slots as opposed to OnePlus 6 or OnePlus 7. As a result, you will definitely end up saving a lot of manual effort, and your precious time as well. As mentioned before, your device will be booted to Fastboot mode due to the fastboot reboot bootloader command. You may now boot it to the OS right from the Fastboot Mode itself or use the fastboot reboot command. Do keep in mind that the first boot might take up some time. It is completely normal. Furthermore, you might have to set up your device from scratch as a complete device wipe has taken place. On that note, let us know in the comments if you have any other queries related to the aforementioned steps. On that note, we conclude this guide to how to restore your OnePlus Nord to stock OxygenOS by flashing the Stock ROM via Fastboot Commands.
How to Update Magisk ZIP and Magisk Manager (without TWRP)Disable DM-Verity or Android Verified Boot without TWRPFix Magisk Module Bootloop without TWRP RecoveryHow to Root Android Devices Without TWRP Recovery
About Chief Editor